Showing posts with label Demo/Tutorial. Show all posts

Saturday, July 9, 2016

Joining Binding- like I did in the demo today at club.

Today at club I demo-ed Magic Binding and I said I would add these videos again to the blog.

Bookmark this post so you can come back to it next time you have a quilt to bind and you would like to use the methods I showed today.


This one shows the making of Magic Binding, but I'm not so keen on how Jenny joins her binding at the end (I've made too many mistakes cutting it first like she does)


This video shows the way I join the ends of my binding. I haven't made a mistake using this method, and I get to trim the ends after I am happy with my seam.

Good luck with your binding.

PS   remember you can click on the 'full screen' icon in the bottom right hand corner (once you have started the video) so the videos are easier to watch.

Sunday, September 11, 2011

Hand Basting

Hi everyone there is Sharon Schamber's video of Hand Basting a quilt using wooden boards. (Sharon has many videos on youtube, if you click on her name above if you want to go to her other videos too.)

This is the method Lynne and I demo'ed yesterday at Quilt Club. NB I have done this a few times now and haven't starched the backing fabric like Sharon recommends, but it has still worked out fine. Also I have used ordinary thread too. What you use is up to you. I do think the key is the zig zag stitching so make sure you do that! 

Lynne and I also used spoons to help us bring the needle up through the fabric and save our fingers. A lot of members had not seen this before, and really liked it. It is an old trick I learnt years ago, I can't even remember where I learnt this! Obviously don't use your best spoons for this as they will get scratched, but it does make it easier on your fingers.

If you are doing this on a table you don't want scratched by your needle, put a piece of card board, or your cutting mat (upside down) underneath the backing fabric to protect your table.

This a great method as you can do this by yourself, with no crawling around the floor and getting sore knees and back. So go and look in the garage or shed and steel your husbands wooden boards or visit Mitre 10 or Bunnings and buy your own.

 TIP if you are buying your own boards look down them from the end to make sure they aren't 'curved', you want nice flat straight boards


Wednesday, August 24, 2011

How to make a 3D Bow Tie Block

This is the block that Lynda demo'ed at our last club meeting. It's really easy, looks much harder than it is.

025-qpr
Start with 5 squares, 2 background and 3 bow tie colours.
053-qpr
Fold one of your bow tie fabrics in half.
031-qpr
Make a sandwich with a background square, the folded square, and another bow tie square.
(right sides together)

NB the arrow in the photo above is pointing to the edge of the fold, on the folded fabric square)
033-qpr
Sew your seam catching the folded fabric between the other squares.
034-qpr
This is what it looks like after you have sewn  the seam, and folded fabrics back. 
035-qpr
Now repeat and sew the other 2 squares to the other side of folded fabric.
NB make sure your fabrics are placed, the opposite of last time so you end up with this.
036-qpr
Lift it up and open the little pocket made by the folded fabric.
045-qpr
Pin the ends, then gently squash block together so the centres meet. 
044-qpr
Pin the 'pocket' edges into the seam. Don't worry if this is wonky and not straight it works out!
047-qpr
See still looks a bit wonky when sewn, but take the pins out and....
050-qpr
Open it up to reveal a beautiful 3D Bow Tie block

Wednesday, October 27, 2010

Patsy Thompson on YouTube

Hi I noticed on YouTube yesterday Patsy Thompson has added heaps of video's. There's a Beginner Machine Quilting series and an Intermediate one too. Here's one of the Intermediate ones if you want to have a nosy. They are all really good and she shares a lot of information on needles, thread etc too.

In the beginner series there's a very interesting 'Spray Basting' lesson. Pasty spray bastes on her wall! To watch her other lessons, search YouTube using Pasty Thompson quilter, as there's a singer too!

Saturday, October 16, 2010

Piecing 101 with Alex Anderson

Recently 'The Quilt Show' started some basic lessons for new quilters. Piecing 101 with Alex Anderson is a series of short videos made by Alex Anderson. A lot of knowledge is shared so if you are a beginner or just want to brush up on some skills check them out.

Here's a few lesson names to give you an idea of what is covered. Stocking Your Tool Belt, Fabric Grains, Prewashing????, Rotary Cutting & Fear of Fractions, The Art of Pressing, Pinning, and more.

You do need to sign up for a free membership to use these beginner lessons, but it is worth it as there is a lot more free stuff to access. Check out the free show under 'Watch Shows'. Also have a look at the 'Projects' and 'Quilt Gallery'.

Monday, October 4, 2010

Leah Day- More Section Quilting

Here's the next two videos from Leah Day on Section Quilting. Leah really makes it look easy! Remember to watch them on a bigger screen, you can click 'watch on youtube' or the 4 arrows for full screen.


Also remember it's Club day this Saturday, have you made any blue nine patches? Bring them along to add the the Charity Quilt project. See you there.

Friday, September 24, 2010

Fabric Fused, Tissue Paper Prints

In my last post I showed you the start of the wall hangings made in Hazel Foot's class. I promised to show you how we made the tissue prints so here we go.....
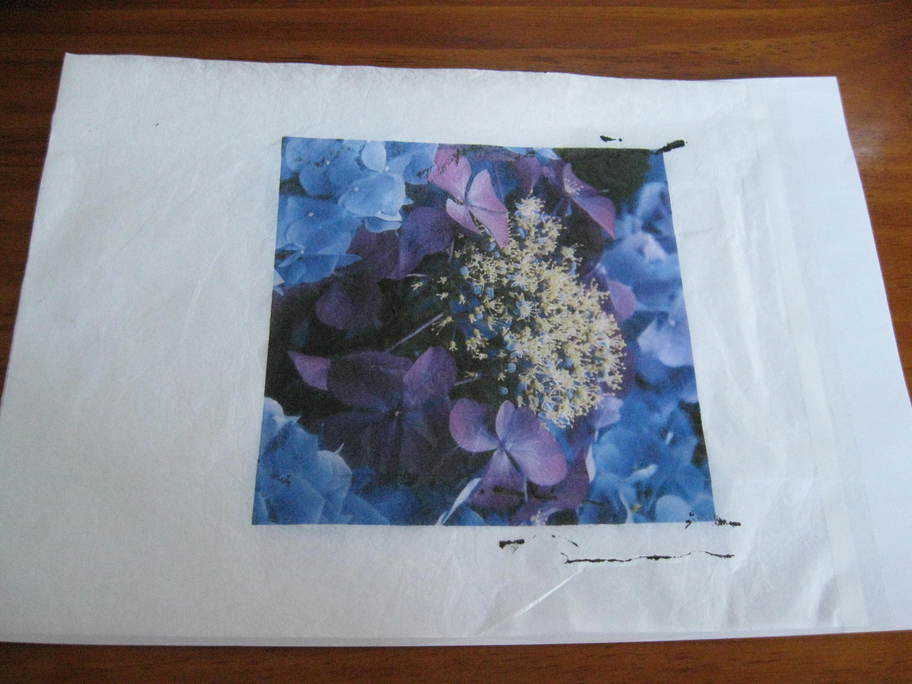
To re-cap here's the end result. A tissue paper print, fused to white fabric ready to be incorporated into a wall hanging. I hope you can see the texture in this photo, the wrinkles in the tissue paper give it an appearance of leather. Click on the photo for a closer look.
Now how do you do it? Cut a piece of tissue paper a little smaller than A4. Tape the tissue paper to your 'normal' piece of A4 paper, a little down from the first edge that goes through the printer. Use one long piece of tape that goes across the whole width of paper.
(I recycled the tissue paper from a shoe box, and used 'invisible' tape, not shiny sellotape)
You may have to click on the photos to see better what I mean! Below I have lifted the tissue paper so you can see better what I have done. (I hope)
Attaching the tissue like this worked for me, but you may have secure the bottom of the tissue paper too, it depends on your printer.

Next put the tissue (attached to 'normal' paper) into your printer feed tray, and print your picture.
UPDATE: The printer I'm using is an inkjet, sorry for not putting that in before, and thanks to Rusty Bird for asking. (25 Sept)
Here's the tissue print fresh from the printer, still attached to it's carrier of 'normal' paper.
I have a little smudging but thats OK I'll just crop it later.
Remove the carrier of normal paper, it was just there to help the tissue paper go through the printer and soak up any excess ink that goes through the tissue.
Trim the tissue print to size, make sure you leave a seam allowance if you are going to use the whole print.
Cut a piece of Vliesofix or Steam a Seam the size of your print.

OPPS I forgot to take a photo of using the iron to fuse the Steam a Seam to the back of the print!
But I'm sure you all know how to do that. Use your silicon appliqué sheet when you are doing the fusing so you don't mess up your iron/ironing board.
OK heres the print after I have fused Steam a Seam to the back, then peeled off the release paper and fused the print (by ironing) to white fabric. Now you just have to trim and sew it into your creation.

On the left is the print I have just fused to fabric, on the right is the one I did the other day. I have redone it because the I wanted to change the colours. If you look closely the centre of the flower is more yellow now, (was lime green) and the pinks more saturated. I changed the colours in my EQ7 quilt software by reducing the 'green' content and the increasing the saturation of all the colours.

Monday, September 13, 2010

Leah Day- Section Quilting

Here's the next set of 'How Do I Quilt This?' video series by Leah Day.
I have been really enjoying these and learning heaps.
I hope you have too.
Remember to check out Leah's wonderful blog, 365 Days of Free Motion Quilting Filler Designs. There's heaps more to see there, and she also has written notes to go with these videos.


Friday, September 10, 2010

Joining Binding Ends

I was looking about on the net the other day and found this gem. This is a really good demo for anyone who has never done this before. I always join the ends of my binding, instead of overlapping, or tucking one end into the other, so the join (seam) is not bulky. But it can be a bit tricky, opening the ends of binding and drawing 45 degree lines etc. And several times I have forgotten to add a seam allowance and trimmed the ends too short!

What is really clever about this video is that it only takes a couple of pins. No measuring, cutting (and maybe forgetting to add a seam allowance!) Just pinning, sewing and then checking seam before trimming. This is going to be my new method. Very interesting that it works using any angle too, not just 45 degrees.

Sunday, September 5, 2010

Blast from the Past

I work at a Primary School, (5 year olds to 10-11 years olds) and was asked by a teacher if I could bring in some embroidery for the kids to look at next week. They have been sewing with plastic needles and threading beads etc, and the teacher would like them it see different things you can do with embroidery etc.
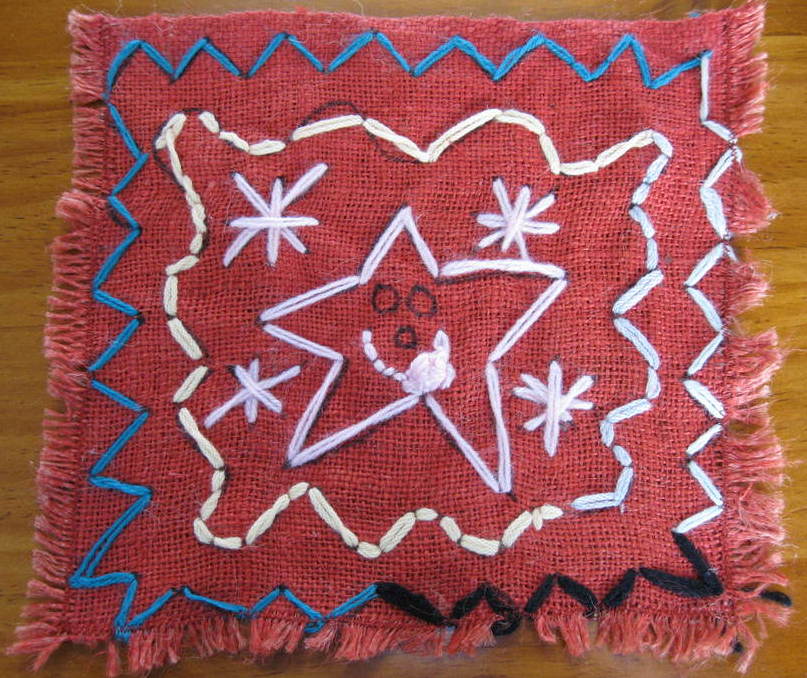
So as well as taking some crazy quilting samples, cross stitch etc I have dug out some stitching my eldest Son did when he was a pre-schooler (He's nearly 20 now). They are so cute (I'm not biased or anything!) I thought I would show you too.

He had a real thing for Trains. You could see the train track from the gate of our old house, so every morning at 10.45am he would be at the gate watching! Each train had its own number and I can remember him running inside to tell me when a train different than usual was running. Also he was a Thomas the Tank Engine fan. I think I may have drawn the outline for him based on Thomas.


He drew this one himself, not sure who it was supposed to be, maybe Dad with his fire helmet on, or it could have been a train driver!


So if you have little kids this is an easy & fun thing to do with them. It's very good for their fine motor skills too.

*Cut some Hessian into small square or rectangles. Then just in from the edge, zigzag around them to stop fraying. (You or the child can pull threads off the Hessian outside of the zigzag stitching to make a fringed edge.)

*Draw a simple design, or have the child draw one, on the Hessian with a marker pen.

*Thread a large blunt tapestry needle with wool. (Use a doubled thread so that the needle doesn't unthread.)

*Demo a few stitches, and then let them go for it.

*Offer help and praise

Thursday, September 2, 2010

All Over Quilting- Leah Day

Leah Day has posted her next set of videos on free motion quilting. I'm putting these on the blog as I think they are the best thing since sliced bread, and the more people who check out Leah's blog the better! Her blog 365 Days of Free Motion Quilting Filler Designs has so much on it, you could spend all day there, so if you haven't had a look make sure you do.

The series she is doing at the moment is all about "How Do I Quilt This?" which is where a lot of us get lost (well I do). I hate it when a pattern or book says, 'Quilt as Desired'! Anyway check out the videos and her blog.


TIP: remember you can click on 'watch on youtube' or click on the 4 arrows in the bottom right hand corner to enlarge the video's


I've been learning heaps from these video's I hope you do too. :-)

Thursday, August 26, 2010

Leah Day- Quilting in the Ditch

Hi everyone, a lot of you are fans of Leah Day and her '365 Days of Free Motion Quilting Filler Designs'. (There's a link to her blog on my 'blog list' on the side bar too, in case you haven't had a look.) Well her designs are great but, if you are like me you can still have problems deciding how it use them in your quilt. Leah has just started a great series of videos on different ways to quilt your quilt. The first technique covered is 'Quilting in the Ditch'. Have a look at them I'm sure everyone who does will learn something, no matter how long they have been quilting. The summary video is especially good, wrapping up the pro's and con's of this technique.

TIP: After you have started the video run your mouse over the bottom right hand corner till you see 'Watch on YouTube' then click to watch on a larger screen.

Quilting in the Ditch Part 1


Quilting in the Ditch Part 2


Summary of Quilting in the Ditch

Monday, May 17, 2010

Abstract Mosaic Wall Hanging- Quick Tutorial

REQUEST, I have noticed this page is getting a lot of looks from all around the world. Hey I'm nosey, so write me a comment on how you found this post! If you make a wall hanging please send me a photo, I'd love to see your version. Leeann :-)

Remember this beautiful wall hanging? Lynne O'Donnell did a tutorial on it at her satellite group the 'Wot Knots'. A few years ago Lynne took a class with Olga Walters - 'Add Libbing with Vliesofix'. This fused mosaic was one of the ideas in the workshop. At home Lynne made it hers by adding silver lamé cut outs and a beaded fringe.
A lot of you have asked for a tutorial on making one so here it is. First cut your background a little larger than you want your wall hanging to be. Chose about 5 fabrics to applique. Can be complementary, contrasting its up to you.
TIP use hand dyes or batiks as this is raw edge applique and you don't want 'white' raw edges showing. If you have to use a pale backed fabric because you just love it, use black as your background, then you can colour in the edges after quilting with a black fabric marker.
Cut squares of your applique fabrics and iron fusible to back of them. Size depends on how big your wall hanging is. Then cut your fused applique fabrics into triangles (or other shapes, but triangles are nice). Arrange them on the background leaving gaps in between. When you are happy iron them down.

Layer your backing, batting and top and quilt as you like (see photos for ideas). Iron fusible to lamé (use an applique sheet as fusible glue sometimes comes through lamé). Cut out shapes from lamé, arrange and fuse, using applique sheet again. TIP if you cut spirals like Lynne did, you get 2. The waste from the spiral you are cutting is a bonus spiral!
Add a beaded fringe to bottom edge, (tuck it in as you sew the binding on). The fringe is made from raw edge strips of fabric with beads. Lynne's fringe was made using her applique fabrics, coming out of the binding on the front of wall hanging. Mine was made using black (the background fabric) and caught in the back of binding. You may want to add a pre-made beaded fringe, its up to you. Complete binding.
Then make and attach a hanger to your quilt. Lynne & I made a strip of background fabric to hang ours, you may want to use a sleeve and dowel, again its your choice. I sewed a wooden skewer into the top edge of the binding to keep it flat against the wall.
Have a look at some of the different ideas from the group below.

Kath has started to quilt hers in radiating diagonal lines and added sequins. Looking forward to seeing this finished.

Elaine has used a fancy feather stitch around her shapes, and then spiral quilted each piece. It gives it a crazy patch look. Elaine didn't want all triangles so has cut some different shapes.

I wanted some curved edges so I didn't do triangles either! I quilted mine in spirals, and added leaf shapes cut from gold lamé.

I sprayed my fringe with water then curled it by twisting and leaving to dry.

My wall hanging 'Falling Leaves', finished.

Tuesday, March 16, 2010

Traditional Japanese Bags

I found this the other day on youtube. It's a traditional Japanese technique, of folding and knotting fabric to make bags. It's very interesting, have a look.

Monday, March 15, 2010

Roll up Quilt Block Carrier


One of the Raffle prizes last Saturday was a 'Roll Up' quilt block carrier. This was made and donated by a member, sorry I don't know who. It was very popular, and a lot of people said they would like to make one, if they didn't win it. So I've done and little searching and found a pattern on Green Bird Machine Quilting. Wonder if any will be made up for show & tell next month?

LinkWithin

Related Posts with Thumbnails